Author: Rudramani Pandey

  • Hashing in Blockchain

    Preface – This post is part of the Blockchain Basics series.

    Introduction

    In the world of database, hashing is a very famous term. Either it is used to sort a table based on hash keys or to encrypt a data using hash function. In this article we will discuss only the second part that in encryption of data. This encrypted data is the actual transaction value stored in a block.

    What is Hashing

    Hashing in blockchain is an encryption process in which an algorithm is used to convert a string of any length to a string of fixed length. It is a very important aspect in case of Blockchain as it helps us to keep track of huge transaction data without even saving them and rather saves hash of that data. There are various mechanism of hashing, such as Bitcoin uses SHA 256 while Ethereum uses Keccak-256 algorithms respectively. The only important thing to take away from this article is that this generated hash keys are the only that stores data of current block and address of the next block, hence helps in linking both the blocks and also keeping track of the previous block.

    How to do Hashing

    If you have understood what a hashing is, then you will be thinking how to implement it. Different programing language provide different modules to hash a data. These modules take a data as input and returns fixed length output. The output length depends upon the algorithm used within the module. For example, if the algorithm is SHA-256, then the output length will be 256 bits long. You can find SHA-256 Module for Node.js here.

    Example of Hashing

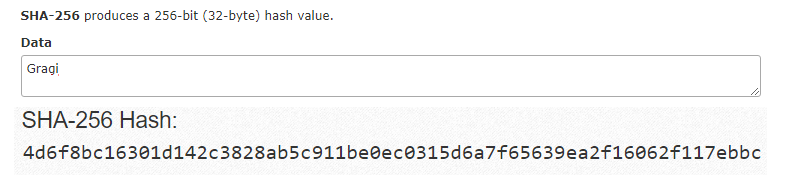
    In the diagram shown below, we have generated hash of a string using SHA 256 algorithm and you too can generate hash values from here. In ABAP you can use Method CALCULATE_HASH_FOR_RAW of Class CL_ABAP_MESSAGE_DIGEST to implement SHA-256 encryption hashing.

    SHA 256 Hashing in Blockchain

    SHA-256 Conversion

    In the example shown below we will write a function in JavaScript to achieve SHA-256 encryption:

    var sha256 = function sha256(ascii) {
      function rightRotate(value, amount) {
        return (value>>>amount) | (value<<(32 - amount));
      };
      
      var mathPow = Math.pow;
      var maxWord = mathPow(2, 32);
      var lengthProperty = 'length'
      var i, j; // Used as a counter across the whole file
      var result = ''
    
      var words = [];
      var asciiBitLength = ascii[lengthProperty]*8;
      
      //* caching results is optional - remove/add slash from front of this line to toggle
      // Initial hash value: first 32 bits of the fractional parts of the square roots of the first 8 primes
      // (we actually calculate the first 64, but extra values are just ignored)
      var hash = sha256.h = sha256.h || [];
      // Round constants: first 32 bits of the fractional parts of the cube roots of the first 64 primes
      var k = sha256.k = sha256.k || [];
      var primeCounter = k[lengthProperty];
      /*/
      var hash = [], k = [];
      var primeCounter = 0;
      //*/
    
      var isComposite = {};
      for (var candidate = 2; primeCounter < 64; candidate++) {
        if (!isComposite[candidate]) {
          for (i = 0; i < 313; i += candidate) {
            isComposite[i] = candidate;
          }
          hash[primeCounter] = (mathPow(candidate, .5)*maxWord)|0;
          k[primeCounter++] = (mathPow(candidate, 1/3)*maxWord)|0;
        }
      }
      
      ascii += '\x80' // Append Ƈ' bit (plus zero padding)
      while (ascii[lengthProperty]%64 - 56) ascii += '\x00' // More zero padding
      for (i = 0; i < ascii[lengthProperty]; i++) {
        j = ascii.charCodeAt(i);
        if (j>>8) return; // ASCII check: only accept characters in range 0-255
        words[i>>2] |= j << ((3 - i)%4)*8;
      }
      words[words[lengthProperty]] = ((asciiBitLength/maxWord)|0);
      words[words[lengthProperty]] = (asciiBitLength)
      
      // process each chunk
      for (j = 0; j < words[lengthProperty];) {
        var w = words.slice(j, j += 16); // The message is expanded into 64 words as part of the iteration
        var oldHash = hash;
        // This is now the undefinedworking hash", often labelled as variables a...g
        // (we have to truncate as well, otherwise extra entries at the end accumulate
        hash = hash.slice(0, 8);
        
        for (i = 0; i < 64; i++) {
          var i2 = i + j;
          // Expand the message into 64 words
          // Used below if 
          var w15 = w[i - 15], w2 = w[i - 2];
    
          // Iterate
          var a = hash[0], e = hash[4];
          var temp1 = hash[7]
            + (rightRotate(e, 6) ^ rightRotate(e, 11) ^ rightRotate(e, 25)) // S1
            + ((e&hash[5])^((~e)&hash[6])) // ch
            + k[i]
            // Expand the message schedule if needed
            + (w[i] = (i < 16) ? w[i] : (
                w[i - 16]
                + (rightRotate(w15, 7) ^ rightRotate(w15, 18) ^ (w15>>>3)) // s0
                + w[i - 7]
                + (rightRotate(w2, 17) ^ rightRotate(w2, 19) ^ (w2>>>10)) // s1
              )|0
            );
          // This is only used once, so *could* be moved below, but it only saves 4 bytes and makes things unreadble
          var temp2 = (rightRotate(a, 2) ^ rightRotate(a, 13) ^ rightRotate(a, 22)) // S0
            + ((a&hash[1])^(a&hash[2])^(hash[1]&hash[2])); // maj
          
          hash = [(temp1 + temp2)|0].concat(hash); // We don't bother trimming off the extra ones, they're harmless as long as we're truncating when we do the slice()
          hash[4] = (hash[4] + temp1)|0;
        }


  • Table Maintenance Generator in SAP ABAP

    Preface – This post is part of the ABAP Beginner series.

    Introduction

    In SAP ABAP Tables, it is sometime required to maintain a table (Create, update, edit or delete a record) manually. In this case, Table Maintenance Generator helps us to achieve the same. In this article, we will explore Table Maintenance Generator and will also learn the events associated with it.

    Definition

    • A tool used to tailor the tables created by end users.
    • End user do not have access to SE11 or SE11 T-Codes in production system so by using the generator they can customize the tables.
    • The end users can create, delete and modify entries.
    • After every changes done, user must go to SM30 T-code and by passing view/table name, select the maintain button to get the changes reflected.

    Prerequisite

    When we create a table in SE11 ABAP Dictionary, some features need to be activated.

    1. Delivery class
    • Delivery class are used for controlling data transport of tables for installation, upgrade, and client copy, and for transporting between customer systems.
    • The delivery class is also used in extended table maintenance.

    TMG Delivery Class


    • It helps in filling seven entries.

     Delivery Class Entries


    1. Data Browser/Table View Maint.
      This tab states whether data can be displayed or maintain a database table or view using the tools Data Browser T-code SE16 and Table View Maintenance T-codes SM30 and SM31.

    It has 3 features:-

    • Display/Maintenance allowed – A user can view in data browser as well as make changes in the data browser and also maintain and display in SM30 and generate table maintenance dialog in SE54.
    • Display/Maintenance allowed with restrictions – A user can view and make changes but with some restrictions.
    • Display/Maintenance not allowed – A user can neither view in data browser (SE16) nor maintain.

    Table View Maint

    How to Create a Table Maintenance Generator

    • Go to SE11 (ABAP Dictionary) => pass the table name => change => utilities => table maintenance generator => Generate table maintenance dialog: Generation Environment.

    Generate table maintenance dialog

    • Pass the Authorization Group name, if there is no specific group of people then assign it to &NC& (without authorization group). In total 759 groups can be assigned.
    • Authorization object – Element of the authorization system. Authorization objects allow complex checks linked to several conditions of an authorization which allows a user to carry out an action.
    • Function Group – Pass the name where generated maintenance modules can be stored. It can be same as the table name.
    • Maintenance Screens
      • Maintenance type
        • Select the maintenance type and click on find screen numbers on the tool bar=> propose screen numbers => Screen number gets populated => Create a button on the application toolbar => Assign TMG and function group to the proper package and click OK.
        • A pop up appears (Request completed without errors).
        • Table maintenance generator is created with this message in the status bar.
    • Description of maintenance types
      • One step maintenance, one screen that is overview screen is displayed in which the entries are displayed in the form of lists.
      • It is processed at run time.
      • Entries should be displayed in one line of the screen.
      • Two step maintenance, an additional screen (single screen) is processed at run time.
      • The single screen can be called from the overview screen by function key for every entry.

    How to Use a Table Maintenance Generator

    Follow the given steps to use a Table Maintenance Generator:

    1. Go to SM30

    Table Maintenance Generator

    1. Pass the name of the table => Maintain (click) => the overview screen appears.

    TMG New Entries

    1. Click on NEW entries => add new entries and save (this is a part of another screen).

    As mentioned, only one record at a time is allowed to enter, since it is user friendly.

    1. If we do any changes in the table, then we need to re -adjust, re-create TMG.

    Events of a Table Maintenance Generator

    Follow given steps to create Events in ABAP TMG

    1. SE11 => Change => TMG => Environment => Events

    TMG Events

    1. After selection of type of event => Editor => Write the code between FORM/ENDFORM.

    TMG Event Form

    1. List of available events:

    TMG Event List 1 TMG Event List 2


  • What are Restful Web Services

    Preface – This post is part of the SAP ABAP OData Tutorial series.

    Introduction

    In our previous article we have discussed what is an API. There are different types of API calls e.g. Simple Object Access Protocol (SOAP), Remote Procedure Call (RPC) and Representational State Transfer (REST). All these API calls have same purpose i.e. to transfer data securely among two or more systems. In this article we will only explore the Restful Web Services.

    What is REST

    As stated earlier, REST stands for Representational State Transfer. It is a simple way of sending and receiving data between client and server. It doesn’t require any software or standards to transfer data. It has a predefined structure to do the API call. Developers just need to use the predefined way and pass their data as JSON payload.

    Restful Web Services

    Attributes of Restful Web Services

    A RESTful web service has following six constraints/attributes:

    1. Client-Server: It is a very important aspect of REST APIs. A REST API follows client-server architecture and these both should be separate. It means both the server and client can not be same server. In case it is same, you will receive CORS error.
    2. Stateless: In REST, all calls are treated as a new call and any previous call state will not give any advantage to the new call. Hence during each call, it is required to maintain all the necessary authentication and other information.
    3. Cache: A REST API encourages the browser and server caching process to enhance its processing speed.
    4. Uniform Interface: The interface between the Client and Server remains uniform, hence any changes in either side will not affect the API functionality. This help in development of Client and Server system independently.
    5. Layered System: REST allows usage of layered structure in server side i.e. you can have data on different server, authentication on different server while the API on different server. The client will never come to know that it is getting the data from which server.
    6. Code on Demand: It is an optional feature of REST API where server can even send executable code to the client that can run directly during run time.

    Methods in Restful Web Services

    Using Restful web services, we can perform these basic four operations:

    1. GET: This method is used to get a list of data from server.
    2. POST: This method is used to post/create a new record in server.
    3. PUT: This method is used to update an existing record of server.
    4. DELETE: This method is used to perform deletion of a record at server side.

    Note: Just calling the above method doesn’t guarantee that the operations will be performed until these operations are implemented at the server side too.

    Advantages of Restful Web Services

    Following are the major advantages of a RESTful API:

    • They are simpler and flexible to implement
    • It supports greater variety of data formats e.g. JSON, XML, YAML, etc.
    • It is faster and provides better performance

    Disadvantages of Restful Web Services

    Although REST services tend to provide multiple benefits, still it has given demerits:

    • To implement state related query the REST Headers are required which is a clumsy work
    • The PUT and DELETE operations are not usable through firewalls or in some browsers.
  • Differences between Constructor and Class Constructor

    Preface – This post is part of the SAP ABAP OData Tutorial series.

    Before discussing the difference between Constructor and Class Constructor, let’s have a short introduction of the two.

    Introduction

    Constructors are a special type of method in a class that is called automatically by the system to set the initial state of a new object or the class. They cannot be called using the CALL METHOD statement. The constructors are always present in a class but to implement a constructor it must be declared explicitly with the METHODS or CLASS-METHODS statements.

    There are two types of constructors: Instance constructor and Static Constructor.

    Constructor

    The predefined method CONSTRUCTOR is an instance constructor of the class.  This instance constructor is automatically called when an instance of the class is created. Its signature can have only importing parameters or exceptions. Since it is an instance method, it can access all the attributes of the class.

    Syntax to declare :

                    METHODS : constructor.

    Class Constructor

    The predefined method CLASS_CONSTRUCTOR is a static constructor of the class and is automatically called when the components of the class are accessed for the first time. Its signature cannot have importing parameter or exceptions.  It is called once for each class irrespective of the instance created.

    Syntax to declare :

                    CLASS-METHODS : class_constructor.

    Now, let’s have a look at their difference.

    Constructor and Class Constructor

    Differences between Constructor and Class Constructor

    Constructor Class Constructor
    It is executed automatically whenever an object is created or instantiated. It is executed automatically whenever the first call to the class is made.
    It is called once for each instance. It is called only once for each class and internal session.
    It is declared using METHODS statement. It is declared using CLASS-METHOD statement.
    It has only Importing Parameters. It has no Importing and Exporting Parameters.
    It can raise exception. It cannot raise exception.
    It is an Instance method. It is a static method.
    It can access all attributes of a class. It can access only static attributes of a class.


  • Differences between Call by Value and Call by Reference

    Preface – This post is part of the SAP ABAP OData Tutorial series.

    Before discussing the differences between Call by Value and Call by Reference, let’ have a quick introduction of the two.

    Introduction

    Modularization techniques in ABAP is a way to write codes in different processing blocks like subroutine, Function Modules and ABAP objects. If these blocks have any parameter interface, while calling them it is required to pass values to all the formal parameter interface. These blocks with parameters can be called via either Call by Value or Call by Reference.

    Call by Value

    In Call by Value, the value of the actual parameters is copied to the formal parameter of the function. The value of the two types of parameters is stored in different memory locations. The memory location of the formal parameter is allocated when the function/subroutine is called and gets freed when the function/subroutine returns. The references to the formal parameter refer to a unique memory and are only known within the function/subroutine. Any changes done inside the function/subroutine are not reflected in the actual parameter.

    Call by Reference

    In Call by Reference, the address of the actual parameters is copied to the formal parameters of the function. The references to the formal parameter reference the same memory as of the actual parameter. Any changes done inside the function/subroutine are reflected in the actual parameter i.e. all the operations are performed on the value stored at the address of the actual parameter, and the modified value is stored at the same address.

    Now, let’s have a look at their difference.

    call by value and call by reference

    Differences between Call by Value and Call by Reference

    Call by Value Call by Reference
    The value of the actual parameter is copied into the formal parameter. The address of the actual parameter is copied into the formal parameter
    Both the parameters are stored in different memory locations. Both the parameters refer the same memory location.
    The change in formal parameters is not reflected in the actual parameters. The change in formal parameters is reflected in the actual parameters.
    Original value cannot be changed. Original value is changed.


  • How APIs work

    Preface – This post is part of the SAP ABAP OData Tutorial series.

    Introduction

    Everything is online nowadays. From grocery website to online medical services, we can do anything and everything right from our home with the help of any electronic device such as laptop, PC or mobile. Have you ever wondered that how the App or the website you visit understands you and processes your payment. This all happens with the help of different APIs. In this article, we will learn all about APIs. All the OData servies are also an example of APIs.

    What is an API

    An API stands for Application Programming Interface. As the name suggest, an API is an interface between two applications. These are the programs written in such a way that they accept certain inputs, process them and returns an output.

    E.g. We can create an API which can accept two numbers and return their sum. It sounds crazy to do such basic job, but it is just an example.

    How APIs Works

    To better understand this flow, we will illustrate the same using step by step process, as shown below:

    How API Works

    The API is triggered by a script code in UI, in our case UI5/FIORI App. The call is in the form of either of any CRUD operation. In case of Read calls, the returning response consist of JSON data. In case of Create, Update and Delete operations, the response is just a status where 200/201 represents success. We will study more about API Response codes in upcoming article.

    An API is in the form of a URL i.e. Uniform Resource Locator.

    Example: https://service_name/payload

    An API contains the following:

    • HTTP Request: It defines which CRUD operation is being called. E.g. GET is for Read call and POST is for Create call
    • Service Name: It can be your website name or any other registered service name. In case of OData it varies with the OData name.
    • Payload: In case of Create, Update and Delete call, payload is an object sent to the API
    • Response: This is a status with response data. The status represents if the API call was successful or not.

    Example:

    In real world, we can take an example that the API accepts Credit Card details with an amount to deduct, process deduction and returns success status. These types of APIs are widely used by payment gateway industries. The same is illustrated in the GIF below:

    APIs

    Advantages of an APIs

    • It helps in abstraction of Data between two systems
    • It reduces the duplication of code and architecture and enhances modularity
    • It reduces the coding language dependency as any two systems using different coding languages can be connected via an API
    • It reduces rework and enhances code quality as well as readability
  • Difference between Static Attribute and Instance Attribute

    Preface – This post is part of the Differences in ABAP for Interviews series.

    Introduction

    Before discussing the differences between a Static attribute and Instance attribute, let’ have a quick introduction.

    ABAP Class Attribute

    Attributes are data objects of any data type within a class. The state of the class is defined by the content of the attribute. They are defined in the declaration section of the class.

    Static Attribute

    Static attributes and instance attributes are two common types of attributes in the class.

    Static attribute defines the state of the class and this state is common to all the instances of the class. Static attributes can be accessed before any instance of the class is created. For a static attribute, memory for it is allocated only once irrespective of the class instance.  All the instances of the class share the same static attribute. Whenever there is a change in the value of this attribute, it is visible to all the instances of the class.

    Syntax to declare a static attribute:

                    CLASS-DATA static_attribute TYPE data_type.

    Instance Attribute

    Instance attribute defines the instance-specific state of the object. An instance attribute can only be accessed using a reference variable. Memory for an instance attribute is allocated for each instance of the class i.e. if a class have 3 instance attributes and 2 instances of the class then 6 memory locations are allocated for this attribute. Whenever there is a change in the content of the attribute, this change is only visible to that instance which has changed it.

    Syntax to declare an Instance attribute:

    DATA instance_attribute TYPE data_type.

    Difference between Static Attribute and Instance Attribute

    Now, let’s have a look at their difference.

    Static Attribute Instance Attribute
    It can be called irrespective of the class instance. It can be only called using object reference.
    It is declared using CLASS-DATA keyword. It is declared using DATA keyword.
    Memory is allocated only once. Memory is allocated for each instance.
    Every instance shares the same static attribute. Each instance has its own copy of the instance attribute.
    Change to static attribute are reflected to all the instances of the class. Change to an instance attribute is restricted to that particular instance.
    It cannot be redefined in subclasses. It can be redefined in subclasses.


  • Difference between Local Classes and Global Class

    Preface – This post is part of the Differences in ABAP for Interviews series.

    Introduction

    Before discussing the difference between Local classes and Global class, let’s have a short introduction of the two.

    Class

    Classes are a blueprint for objects and represent a set of properties or methods common to all objects of the same type. Classes in SAP ABAP can be defined either locally or globally.

    Local classes

    Local classes hide in a report source whereas Global classes sit themselves out centrally in the class pool within the class library of the R/3 Repository. If you are creating a report to do some specific task without worrying about the outside world, you can create a local class. But if you’re working on a class that may be of interest to other reports, consider creating a global class.

    Let see an example of local class implementation below:

    *---------------------------------------------------------------------*
    *       CLASS MAIN DEFINITION
    *---------------------------------------------------------------------*
    CLASS main DEFINITION.
      PUBLIC SECTION.
    
        "// Instance Methods ( Note: we use the statement 'METHODS'
        "// to define an instance method )
        METHODS set_data IMPORTING i_data TYPE string.
    
        "// Instance Methods ( Note: we use the statement 'CLASS-METHODS'
        "// to define a static method )
        CLASS-METHODS set_classdata IMPORTING i_data TYPE string.
    
      PROTECTED SECTION.
    
        "// Instance Attribute ( Note we use the statement 'DATA'
        "// to define an instance attribute )
        DATA attribute TYPE string.
        "// Static Attribute ( Note we use the statement 'CLASS-DATA'
        "// to define a static attribute )
        CLASS-DATA classattribute TYPE string.
    
      PRIVATE SECTION.
    
        "// Instace event ( Note we use the statement 'EVENTS'
        "// to define aN instance event )
        EVENTS event EXPORTING value(e_data) TYPE string.
    
        "// Instace event ( Note we use the statement 'CLASS-EVENTS'
        "// to define a static event )
        CLASS-EVENTS classevent EXPORTING value(e_data) TYPE string.
    
        "// For more informations about events see the following example:
        "// ABAP Objects - Creating your First Local Class - Using Events
    
    ENDCLASS.                    "main DEFINITION
    Class Implementation
    
    Error rendering macro 'code': Invalid value specified for parameter 'lang'
    *---------------------------------------------------------------------*
    *       CLASS main IMPLEMENTATION
    *---------------------------------------------------------------------*
    CLASS main IMPLEMENTATION.
      METHOD set_data.
        CONCATENATE 'Instance Attribute value' i_data
                                   INTO attribute SEPARATED BY space.
      ENDMETHOD.                    "set_data
      METHOD get_data.
        MOVE attribute TO r_data.
      ENDMETHOD.                    "get_data
      METHOD set_classdata.
        CONCATENATE 'Static Attribute value' i_data
                                   INTO classattribute SEPARATED BY space.
      ENDMETHOD.                    "set_classdata
      METHOD get_classdata.
        MOVE main=>classattribute TO r_data.
      ENDMETHOD.                    "get_classdata
      METHOD print_attribute.
        WRITE: lv_data, /.
      ENDMETHOD.                    "print_attribute
      METHOD print_classattribute.
        WRITE: lv_data, /.
      ENDMETHOD.                    "print_classattribute
    ENDCLASS.                    "main IMPLEMENTATION


    When a class is used in an ABAP program, the system first searches for the local class with the specified name, if not found, it looks for a global class.

    As the Local class is visible to a particular program, visibility of all the component can be set to PUBLIC. A Local class can be defined in a global class. It is defined in the Local Types section and implemented in the Implementation section of the Class Editor.

    Global Class

    The Global class is visible to all the programs, visibility to all components are explicitly assigned. The components with PRIVATE visibility are only accessible in the class itself and are not visible to the subclass.

    SAP ABAP Global Class Builder

    Now, let’s have a look at their difference.

    Difference between Local Classes and Global Class

    Local Class Global Class
    It is defined within a program. It is defined in Class Builder (T-Code SE24).
    It can be only used in programs in which it is defined. It is stored in class pools and can be used by any ABAP programs.
    It can be designed “more open” as it is only accessible to within the context. It can be designed “less open” as it is accessible to all the ABAP programs.
    It can be defined in a global class. It cannot be defined in a local class.


  • MVC Architecture of Web Dynpro

    Preface – This post is part of the SAP ABAP Web Dynpro series.

    Introduction

    Web Dynpro follows MVC architecture. This model, view and controller design is very helpful while designing any web application as it properly segregates the business logic from (HTML-based) views. The three parts work in such a manner that it gives the user a very easy way of accessing the application.

    MVC Architecture

    Model

    As mentioned in the previous articles models are objects that contains business logic statements to read or write data into the database. This model can be developed in various forms depending on the requirements as like  Function Modules, BAPI`s, Classes, etc. Model, when created as a class (Model class), is nothing but a class which forms certain data in it which one will want to show in Web Dynpro Screen.

    View

    In simple words, the view is the screen that is displayed in the browser for the user. This is the place where the user actually interacts with the application. User will provide the input through view in order to fetch the required result. It is used to ensure the appropriate representation of data in a web browser.

    Controller

    Controller works like an interface between the model (which hold the data) and view (which displays the data). That means this is used to control communication between Model and View where it takes input from the users and gets the desired data from the model and displays the data in the browser.

    MVC

    How MVC Architecture works

    Basically, MVC segregates the web application into three different modules, for better understanding let us take an example. Suppose you went to a restaurant to have dinner with your friends, after a couple of minutes you decided what to eat then a waiter came and you gave the order, after noting down he went and gave order details to the chef. Now chef will gather ingredients to prepare your order. After completion of your order, he will notify the waiter to deliver the food to your table. So in a way you are giving your Model name to your View and your view is pulling the data from a model and showing with the help of the controller. This is how any MVC Architecture will work.


    Advantages of MVC Architecture

    1. It is easy to identify where the business logic and view design is. The model will contain only the business Logic, View will contain only the UI design, Controller will contain the code to get the value from UI and send it to Model and vice-versa.
    2. Due to the segregated design pattern, it is easy to enhance the design and business logic as per the requirement.
    3. Use of graphical tools in view part reduces the coding effort.
    4. Use of data binding and context mapping concepts in view part passes the data automatically from source to destination without handling the data.
    5. The goal of MVC is, by segregating models and views, to reduce the complexity in architectural design and to increase flexibility and maintainability of code.
  • Difference between Class and Function Module

    Preface – This post is part of the Differences in ABAP for Interviews series.

    Introduction

    Before jumping to the difference between Class and Function Module, let’s have a short introduction.

    An ABAP program consists of program blocks and is executed sequentially. This is a classical approach for programming known as procedural programming model. This model uses functions and subroutines.

    Object Oriented programming paradigm is based on class and object and aims to implement real-world entities such as inheritance, abstraction, etc.

    Function Module

    Function modules are procedures that have a set of re-usable statements with importing, exporting parameters, etc. These are created in ABAP workbench using the Function Module Builder. They are managed in the central function library. They play an important role in updating and in the interaction between different SAP systems, between SAP systems and remote systems through remote calls. Unlike Include, they can execute independently. Every function module needs to be assigned to a function pool called the function group. A Function group is a container that holds function modules that should be together logically. Function modules also support exception handling to catch any errors while they are running.

    Class

    Classes are a blueprint for objects and represent a set of properties or methods common to all objects of the same type. The components of a class are called data members. The class provides the flexibility to assign visibility to all its data members. Every instance or objects have unique identity and has its own set of values for the attributes. A class can inherit another class and interfaces. You can read more about classes here.

    Now, let’s have a look at their difference.

    Difference between Class and Function Module

    Function Module Class
    It is procedural oriented. It is object oriented.
    It is created using Function Module Builder (T-code se37). It is created using Class Builder (T-Code SE24).
    It is always public. A class can be Public, Private or Protected.
    Variables are always Private. Variables can be Public, Private or Protected.
    Cannot create any instances. Can create multiple instances.
    Inheritance is not possible. Inheritance is possible.
    Screens can be created using it. To create a screen, the class must call another program.